Tag Archives: seasonal

And Now For Something Completely Different

29 Nov

So hopefully the last project I posted gave people lots of festive ideas and helped get you in the holiday spirit. However, I will now be changing gears at lightning speed and bringing you something much more suited for spring:

Upside-Down Daisy Hat

This upside-down daisy hat (from the previously mentioned excellent Itty-Bitty Hats by Susan B. Anderson) is probably one of the best received projects I’ve ever done. When I was first getting into knitting this past summer, my first non-scarf project were plain baby hats for my nieces.  After I was able to master those with minimal difficulty, I saw the pattern for this hat and decided to give it a try. Initially I was worried that it would be too complicated, but I found it to be surprisingly simple and was able to make the ones for my nieces with very little gnashing of teeth. Once family members and friends saw it, I started getting requests. Seriously. I felt like a DJ. So that’s how I ended up knitting one for a family friend’s daughter:

And then my mom wanted me to knit one for one of her work friends who had a baby, which is how I ended up doing this current hat. Because I’ve now done this project four separate times, I think that I’ve got a pretty good handle on it. This last hat went very quickly and easily for me, so if you’re an experienced knitter it should be pretty simple.

That having been said, if you’ve never knit a hat with circular and double pointed needles, it does take a little while to get used to. The fact that the ‘stem’ of this flower is so small makes is somewhat trickier to knit, so if you’re nervous maybe try knitting a basic hat first and then moving up to this one (Itty-Bitty Hats has got great, clear patterns for basic hats).

The pattern calls for Rowan Handknit Cotton (which is a DK weight), but the first time I knit the pattern I had some Caron Simply Soft (which is a medium weight) lying around so that was what I used. I’ll be honest, at the time I had a very limited understanding of yarn weights.  I later realized when I got the Rowan for the candy cane hat I made that by using the Caron I’d used a completely different weight than what the pattern called for (whoopsies!). However, I really liked the way that it turned out in the Caron, so I’ve just used it ever since. If you do choose to use the Caron, the final product might be somewhat bigger than it would be with the Rowan, but I haven’t had any huge issues with them not fitting. Also, the beautiful thing about babies is that they keep getting bigger, so even if it’s on the large side they can grow into it.

Now, onto the knitting!

The hat starts out with a long tail cast on onto circular needles and you simply knit until the hat reaches the length indicated in the pattern. The decrease sequence then begins while you’re on the circular needles and relies solely on knitting 2 stitches together, which makes it nice and simple.

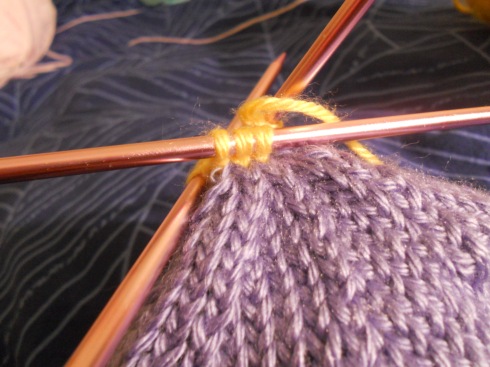
You then transition to circular needle and continue the decrease sequence until you get to a small number of stitches (between 7 and 11, depending on the size of the hat you’d like). You then change to the color you’re using for the center of the flower and continue to knit on the double pointed needles for a few rounds.

The pattern called for a shell color for the center, but I prefer the bright yellow as it makes is look more like a real flower (even though you wouldn’t see the yellow if it were actually an upside-down daisy… minor detail).

After a few rounds of yellow, you then switch over to the green for the stem and work it as I-cord for a few inches. Then you bind off and are finished with the body of the hat.

You then make 5 or 6 petals (depending on the size of the hat) by using your double pointed needles as regular needles. While the pattern shows the petals with a fairly round edge, I’ve found that I actually prefer attaching them opposite to the way they were intended (i.e., I attach the intended tip of the petal to the stem rather than the intended base). This means that I end up with a nice flat end to attach to the stem and a pointed petal that results from the bind off, which I personally feel looks better. Either way works though, so go nuts! Then, pin the petals to the hat so that you can figure out where they need to go. It pays to be pretty precise when doing this so you don’t have to go back and remove petals if they’re not lined up right.

You then begin to sew on the petals using a yarn needle. I’ve found that I get the best results when I stitch in a way that mimics the stockinette edge of the petal (i.e., at a downward sloping angle rather than straight up and down.)

Generally it blends in fairly well and ends up looking pretty clean.

Well that’s it! I hope you can forgive my blatant season hopping. This will probably be a great project to do in February when it’s snowy and terrible and you’d sell your soul just to see a real flower in bloom. This hat won’t quite fill the void, but hat + baby = more awesome than any real flower ever could be.

It’s Beginning to Look a Lot Like Christmas!

27 Nov

It’s that time of year, folks! Starbucks is busting out their holiday cups, radio stations are overplaying the same 15 songs, and people are losing their minds over discounted electronics (my hometown! Such pride).

But even more importantly, the conclusion of Thanksgiving now means that people can begin busting out their seasonal clothing. For people like my mother, this means breaking out the absurdly large collection of shirts/sweaters/sweatshirts that she owns that have some sort of applique Christmas tree on them. For me, this means sticking to my usual winter wardrobe while knitting seasonal things for the people in my life who have yet to develop shame. Thankfully, my twin nieces are still tiny and can make anything look absurdly adorable, which is how they ended up with these:

Candy cane hats! When I first made them, I was a little concerned that I might be more excited about them than my family would be. After all, how much use can you really get out of a striped stocking hat? Apparently, if you’re a baby, the answer to that question is a whole hell of a lot. The entire time I was with the twins for Thanksgiving they wore them at least once a day and my entire extended family and all of my brothers in-laws loved them.

The pattern for these adorable hats comes from the book Itty-Bitty Hats by Susan B. Anderson. This book is one of my favorites and is full of wonderful, creative patterns.  This past summer, I really got into knitting and mastered the basic techniques by doing a bunch of different hats from this book. Its explanations are designed so that even beginner knitters can follow them easily, but I never felt like they were so drawn out that they were tedious. In addition to adorable patterns, it also has a wonderful introduction session that’s a great, simple reference for a lot of basic techniques.

For the yarn, the pattern called for Rowan Handknit Cotton (one skein each of Rosso #215 and Ecru #251). Initially, I intended to just go to Michaels and buy whatever Light/DK yarn I could find in red and white. However, I quickly discovered that most of the yarn they carry in that weight is geared towards baby projects and is therefore pastel, which did me no good. Resigned, I ordered the yarn online instead and got two skeins of each color because I needed to make two hats. This ended up being significantly more than I needed, as I was able to make two hats in the 0-6 month size without entirely finishing either skein. The hats also required 16″ circular needles and a set of 4 double pointed needles, both in size 7. I also found that having a set of point protectors was extremely helpful to keep the knitting from slipping off the double pointed needles as the number of stitches decreased.

Now, onto the knitting!

The hats begin with a long tail cast on to the circular needles and you simply knit continuously around, switching colors every two rows. When I showed my mom how to knit a hat on circular and double pointed needles this summer, she had a very hard time getting the hang of it despite the fact that she’s a pretty experienced knitter. Personally,I don’t feel that it’s that complicated, but it does take a little while to get used to it. The advantage of knitting them this way (compared to on straight needles and sewing the seam) is that you get a lovely stockinette stitch without ever having to purl, but it means that you end up with a hat with a rolled brim. I personally like the rolled brim for the baby hats, and I also really hate sewing seams, so for me its a no-brainer.

That having been said, if you haven’t used circular and double pointed needles before, this might not be the project to learn it on. Because you have to change the color you’re working with often, it adds another element and increases the difficulty level. And if you’re not paying attention, you can end up with a really terrible seam like this:

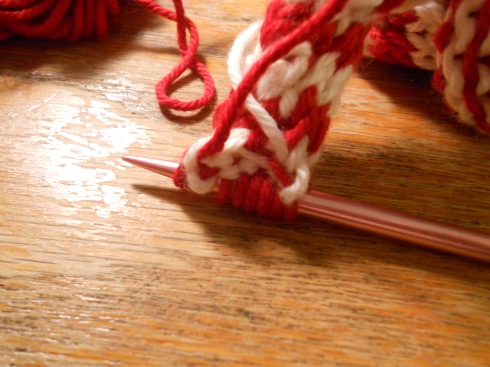
For the first hat, I didn’t really take the time to wrap the yarns around each other every time I changed colors. In the other projects that I’ve done, it hadn’t seemed to make a difference. However, because this hat has a stripe pattern, not wrapping the yarn leaves gaps and makes it so the stripes don’t quite match up on the opposite sides of the seams. I didn’t really notice this until I had completed a good portion of the first hat, by which point it was too late to fix. However, just by wrapping the yarn around the other color when switching colors like such:

…meant that the seam was significantly less visible and the stripes matched up much better.

The seam, which is where the stitch marker is, isn’t completely perfect, but it was much better than the one for the first hat.

The other challenge of this project was just keeping the knitting on the needles as I decreased. As you can see, you end up with a very small number of stitches as you work towards the top of the hat:

It becomes something of a pain as you’re knitting rows upon rows of these small rounds and they keep slipping off the needles. There were several intense swearing bouts that happened as the needles slipped out and I had to ever-so-carefully pick it up without losing stitches. Eventually I just started putting point protectors on the ends of the needles to keep them from slipping. While having to remove and replace them every time is something of a pain, I feel like it saves time in the long run because you don’t have to stop and pick up dropped stitches.

Another somewhat unusual technique this hat uses is I-cord, which seems complicated but is actually really simple. In fact, according to Itty-Bitty Hats, the name is short for “Idiot-cord” because it’s so easy an idiot could do it. This technique involves gathering all of your stitches on one double pointed needle:

From there, you slide your knitting to the right side of the needle and then knit using the yarn that’s protruding from the left side. This causes the yarn to cross over and make a small cord. As you’re doing this, make sure that the end of the white that you will have just cut makes it into the center of the cord. Also, if you gently tug down after each row, it will help with the formation of the cord. Eventually, you’ll end up with this:

After that, all you have to do is bind off and attach your pom, and you’re done!

Side note: the fact that this hat is so long and skinny means that it took me significantly longer to knit than the normal ones I’ve done. While I can knock out a simple hat in an afternoon, these both took me probably the equivalent of an entire day. Just something to keep in mind if you’re trying to squeeze in the project to meet a holiday deadline.